Too Many Campaigns
In the past you have always needed to create a campaign for each banner size that an advertiser wishes to run on your web properties. Sure, our campaign copying function eased the pain of this a little bit, but this still left a big problem unsolved. You had to split the number of impressions your advertisers purchased up between each of those campaigns. That sounds easy enough, but in practice different banner sizes have more available inventory than others and some may even be oversold at certain times.
The Solution
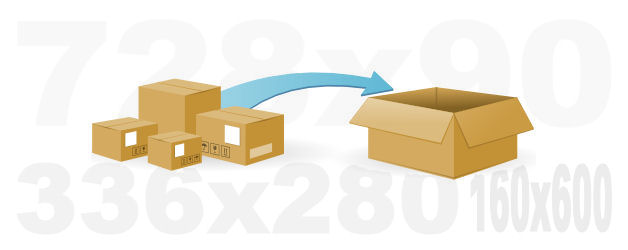
To address this long-standing problem we have made it possible to consolidate multiple banner sizes into a single campaign.
For example, you can now create a single campaign that contains 728x90, 336x280 and 160x600 banners and set that campaign to deliver a total of 500,000 impressions. Those impressions will then be distributed between the banner sizes on a best-effort basis with respect to inventory availability. This will prevent campaigns from coming up short if inventory is too tight or oversold for any of the given sizes by allowing the other sizes to automatically pick up the slack!
Making a Consolidated Campaign
I am going to assume that you already have 728x90 and 336x280 media and zones set up. This example is only going to focus on creating the campaign. I will also highlight what is different from the way this process used to work.
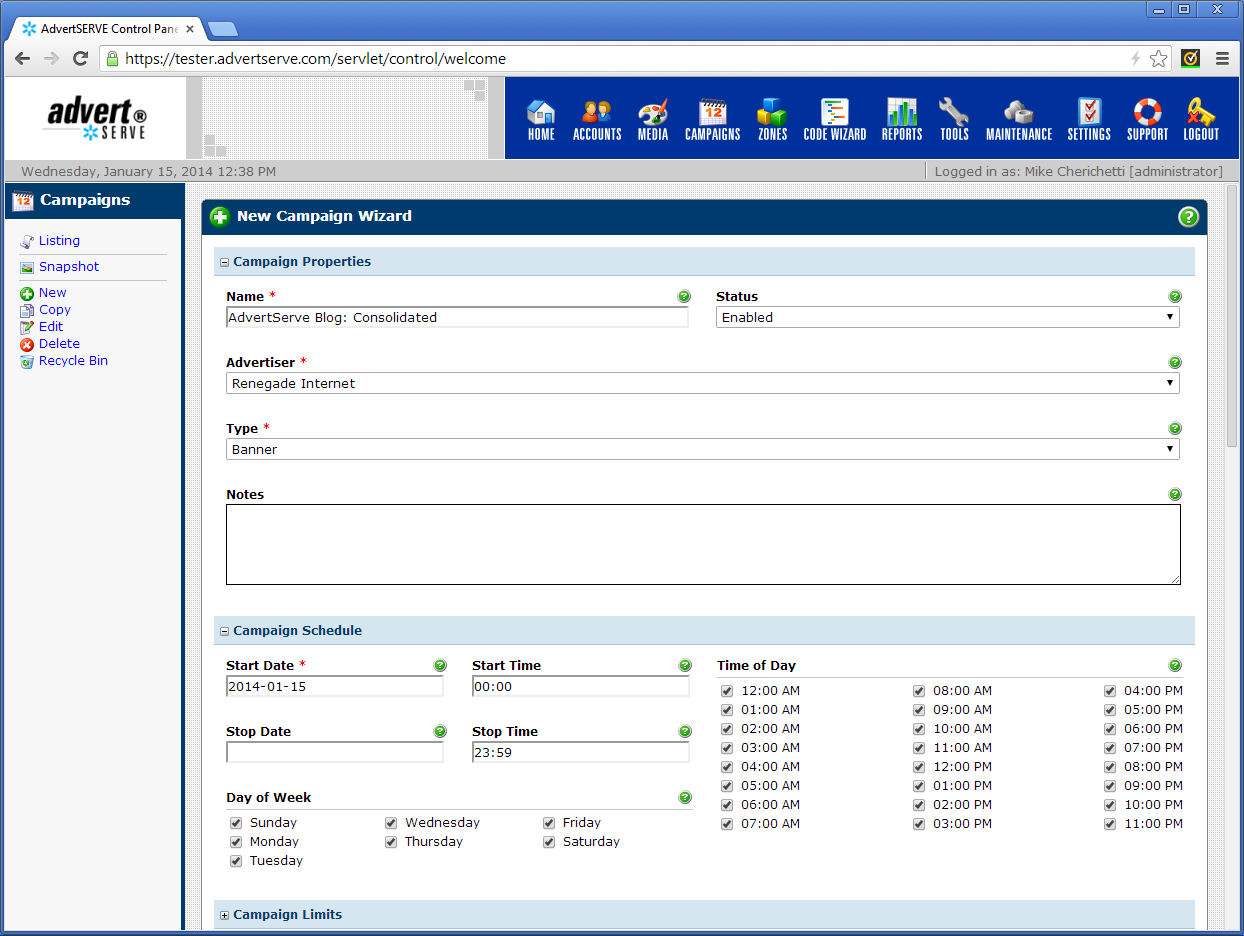
- Go to Campaigns and click on Create New Campaign to get started.
-
The first thing you will need to do is give your campaign a Name and select
an Advertiser and the type of the campaign will be set to banner by default,
so leave that unchanged.
-
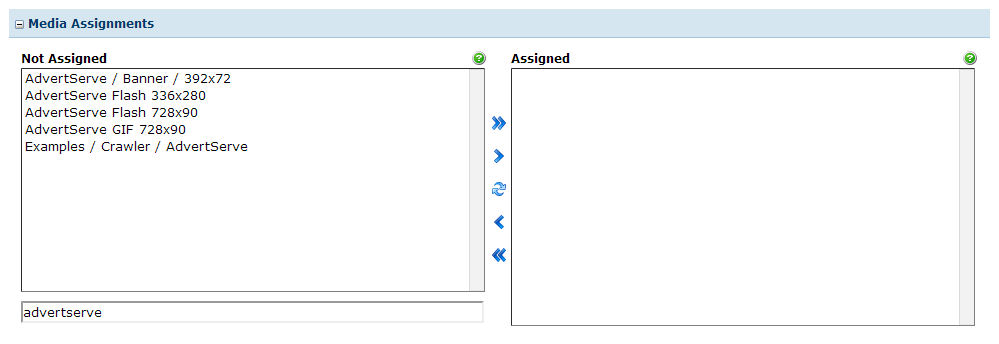
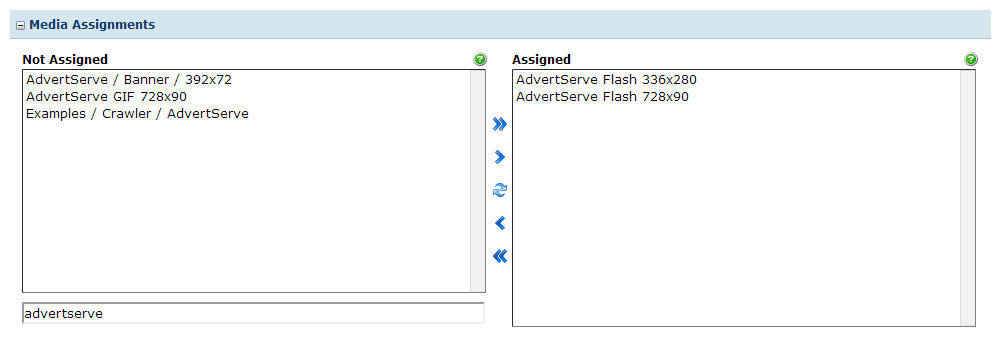
Next if you scroll down to Media Assignments you will see all of the
active banners belonging to the selected advertiser. You can use the instant
search to find the desired media. Some good advice here is to make sure to
include the banner size (i.e. 728x90) in the names of your media so that you
can search by size.
-
Anyway, go ahead and select a 728x90 banner and a 336x280 banner from the list
of available media.
-
Once you have selected some media you will see that the Zone Assignments
box is automatically filled with zones matching the size(s) of those media, so
you can be sure that you are assigning your campaigns to the appropriately sized
zones.
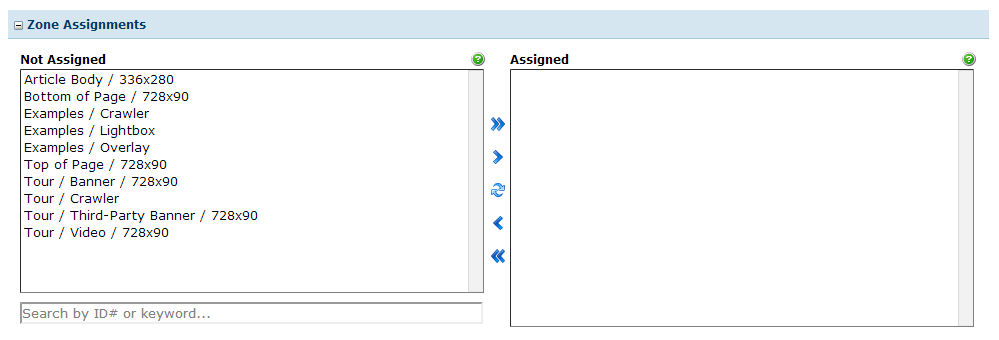
- Finally, after you have selected some zones you can go ahead and press the Create Campaign button.
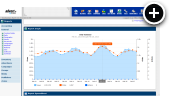
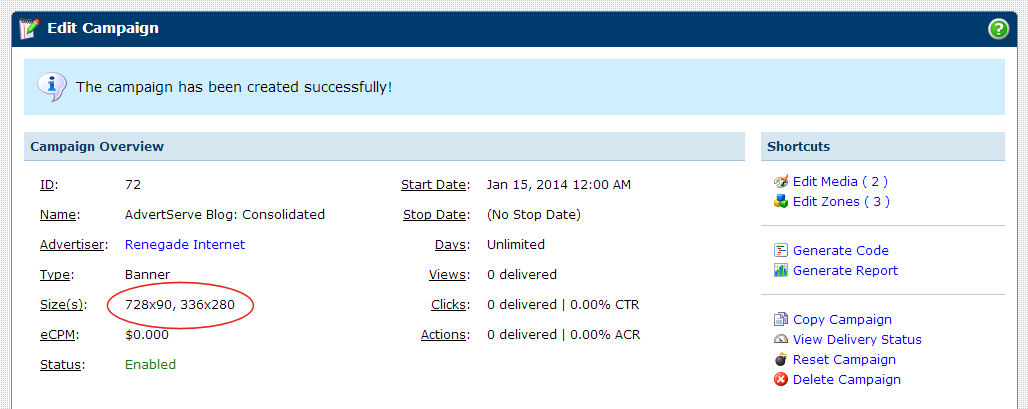
Once your campaign is created, the campaign overview will now show you all of
the media sizes that the campaign contains as you can see in the following example.
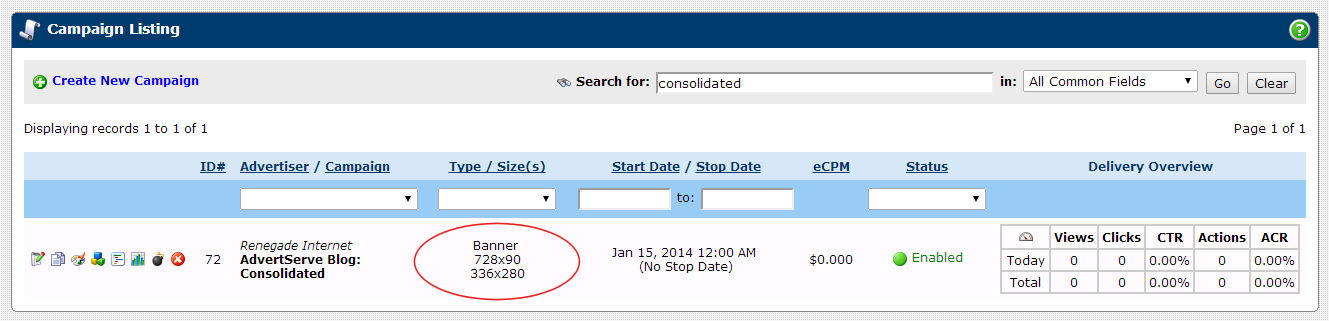
 Similarly the campaign listing also shows all of the media sizes that the campaign
contains and you can filter/search by any of those sizes as well.
Similarly the campaign listing also shows all of the media sizes that the campaign
contains and you can filter/search by any of those sizes as well.
You will notice some other places in the control panel where we show you the campaign, media or zone sizes that we did not previously show them to make the size relationships more clear.
Final Thoughts
We hope that you find this option to consolidate campaigns will both save you time and help to ensure that you meet the impression goals of more campaigns on time. Keep in mind that you can still create individual campaigns for each banner size. In fact, something to consider is that if you price impressions or clicks differently for each banner size that will still require separate campaigns for each banner size. All impressions or clicks must be sold at a consolidated rate in order to take advantage of consolidated campaigns. Of course, that is always something you can change in your sales process now that you have the option of selling consolidated campaigns to your advertisers.
 Mike Cherichetti