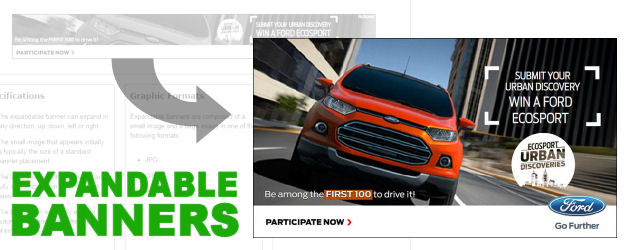
What is an Expandable Banner?
Expandable banners initially have the appearance of a standard banner. For the sake of an example, consider that you have a 728x90 banner sitting at the top of your site. Now, suppose you hover your mouse over that banner and suddenly it expands downward to reveal a much larger 728x400 banner with additional details about the offer. That is essentially how an expandable banner works. It takes a standard banner space that you already have and turns it into a much larger space in a very efficient manner that does not require any juggling of content.
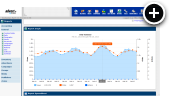
Live Example
The following example is a 468x60 banner that expands to 468x270 on desktop/tablet or a 300x50 banner that expands to 300x250 on mobile. Typically a 970x90 or 728x90 is used for desktop. I'm only using the smaller size here since this blog is not wide enough to accommodate those larger sizes.
Creating an Expandable Banner
Already know how to create a graphic banner with AdvertServe? The process for creating an expandable banner is very similar. In fact, the only difference is that you have two images with an expandable banner. One image is for the initial banner and the second image is the larger expanded version.
-
Go to Media and create a new media.
- Give your media a name and select the advertiser to associate it with.
- Select Expandable Banner for the media type.
- The size you choose will depend on the size of your banner zone, but for lack of space on this blog I am going to use a 300x300 banner that expands to a larger 560x600 banner.
- Next you need to upload the Small Image and Large Image using the provided fields.
- Then you will want to enter a Redirect URL for the banner, which is simply a link to the offer on the advertisers web site.
- The last required step is to enter the Expanded Width and Expanded Height of the banner, which in my case again is 560x600.
- Optionally you can choose the Open Direction in which the banner will expand. This is generally dictated by your banner position. If your banner is at the top of the page you want to have it expand down. On the other hand, if it is on the left side of the page you want to have it expand to the right. For this example, again due to the layout of this blog, mine will expand to the right.
- You'll obviously want to set up a campaign next to schedule your expandable banner media to run in a zone on your live web site, but for the purpose of this example we'll skip those extra steps.
- Once your media has been created you can preview it in the control panel to see how it shows up.
- To test your media out on an actual page, simply click on the Generate Code link found in the upper right corner of the media preview page. From there select the type of code you want. In most cases the HTML code is the best choice. Then simply copy and paste that code into your test page where you would like the banner to appear.
Final Thoughts
At the end of the day, the expandable banner is yet another tool that you can deploy to increase the earnings potential of your web site. There is a fine line between too much ad space and too little content space. The expandable banner can help you break through that barrier by not taking up any more content space than a standard banner. Plus, since zero coding is required on the part of the advertiser their creative development costs drop dramatically, which leaves more funds for them to direct at their ad spend.
 Mike Cherichetti