What is VAST?
The IAB's Video Ad Serving Template (VAST) specification is a universal XML schema for serving ads to digital video players. It provides support for linear pre-roll, mid-roll and post-roll MP4/FLV/WebM video ads as well as non-linear GIF/JPG/PNG, Flash (SWF), text, HTML, <IFRAME> and <SCRIPT> banners. In addition to this it also specifies video tracking events, which enables measurement of video advertising consumption.
VAST Wrapper
The VAST specification supports the use of wrappers. A VAST wrapper is a VAST response that points to a VAST ad hosted by a third party ad server. It is also possible for a VAST wrapper to point to another VAST wrapper, creating a chain of VAST wrappers that finally point to a VAST ad. Each VAST wrapper that is loaded contains tracking information, which allows all ad servers involved to track impressions, clicks and other VAST supported tracking events.
Getting Started
We learned how to deploy CDN hosted, pre-roll video ads using JWPlayer in our previous tutorial. In this tutorial we're also going to use JWPlayer, but this time we're going to be wrapping a third-party VAST tag. The major difference here is that there is no video to upload. If you followed along with our previous tutorial you'll find this one is much shorter for that reason.
Creating a VAST Tag Wrapper
Creating the Media
You'll obviously want to set up a zone with multiple campaigns/media on your live web site, but for the purpose of this example we'll skip those extra steps.
- Log in to your AdvertServe account.
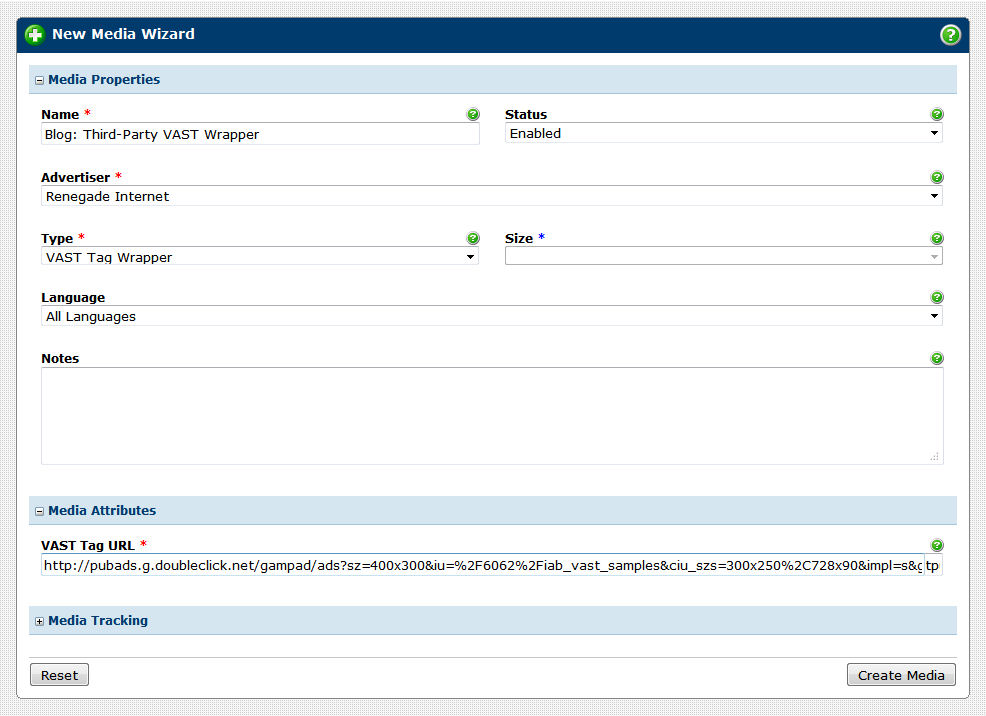
- Go to Media and create a new media. Select VAST Tag Wrapper for the media type.
-
Enter the following URL in the VAST Tag URL field:
http://pubads.g.doubleclick.net/gampad/ads?sz=400x300&iu=%2F6062%2Fiab_vast_samples&ciu_szs=300x250%2C728x90&impl=s&gdfp_req=1&env=vp&output=xml_vast2&unviewed_position_start=1&url=&correlator=[timestamp]&cust_params=iab_vast_samples%3Dlinear -
Review your settings and make sure they look like the ones in the screenshot below.
- Press the Create Media button.
Generating the VAST Tag
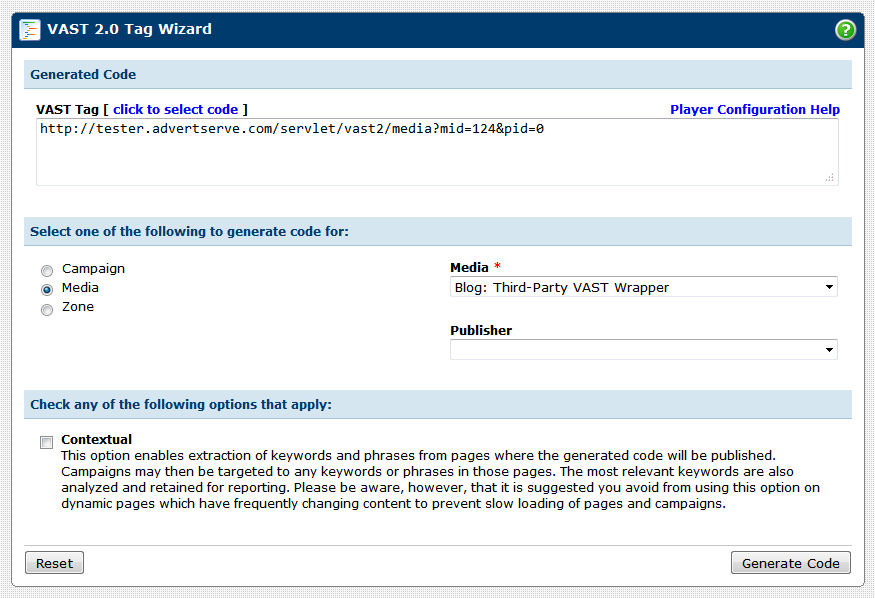
- After you have successfully created the media, simply click on the Generate Code shortcut that appears on the top right side of the screen.
-
You'll be presented with a VAST Tag that you simply need to copy and paste into the JWPlayer
settings.
Video Uploading and Player Configuration
- Go to jwplayer.com and sign up for the JW Player enterprise plan if you haven't already.
- Log in to your JW Player account.
-
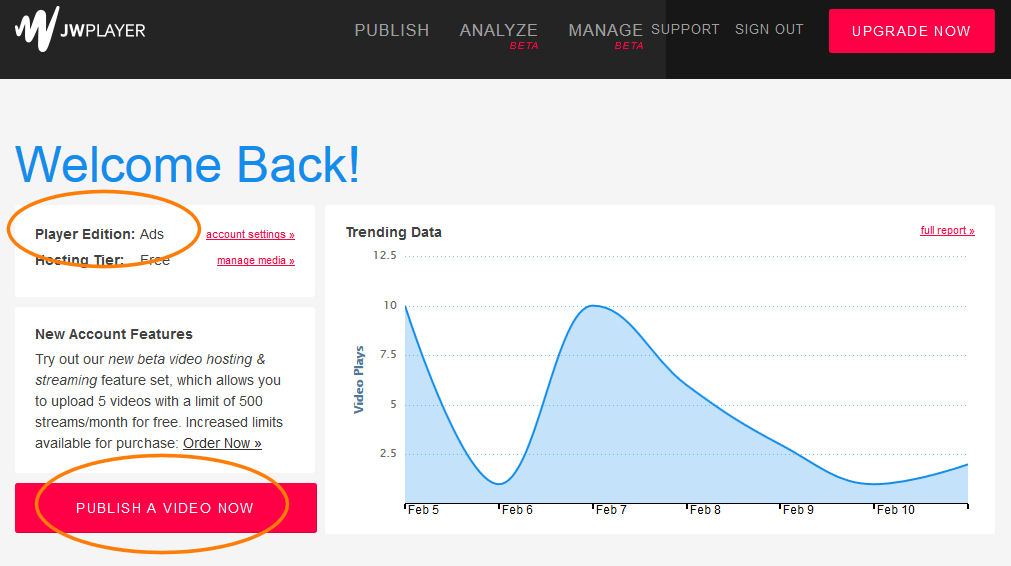
Click on the Publish a Video Now button and make sure your Player Edition is the Ads version as
shown in the screenshot below.
-
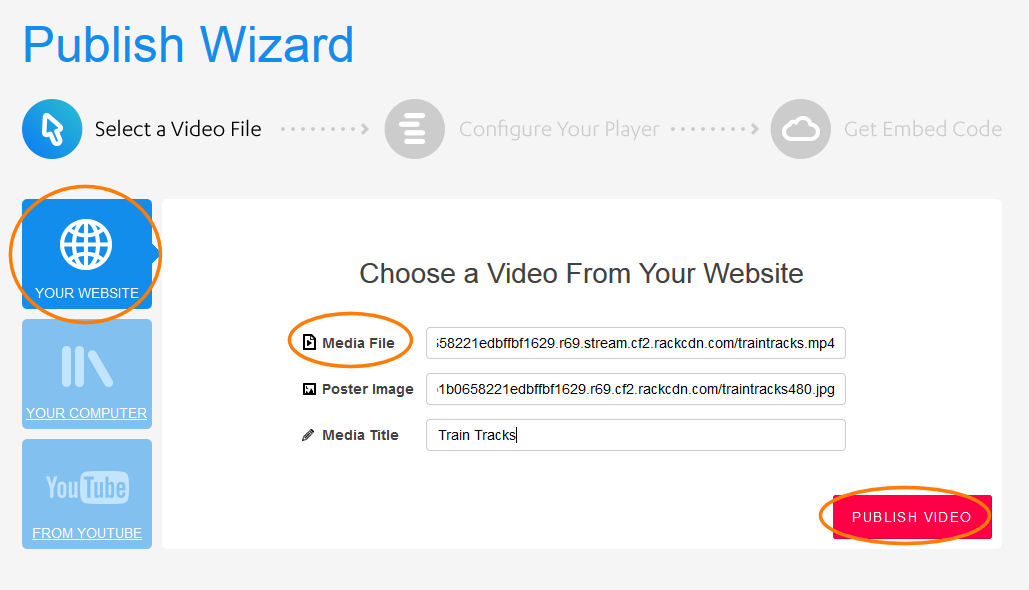
Click on the Your Website button and then you'll need to enter the streaming URL for another
video that you've uploaded to RackSpace Cloud Files. I'm using a video of an animated flyby over some train tracks.
I also happen to have a JPG image that I'm using for the poster image as shown in the screenshot below, however,
this is completely optional.
-
On the next screen you'll be able to customize the video player to your liking.
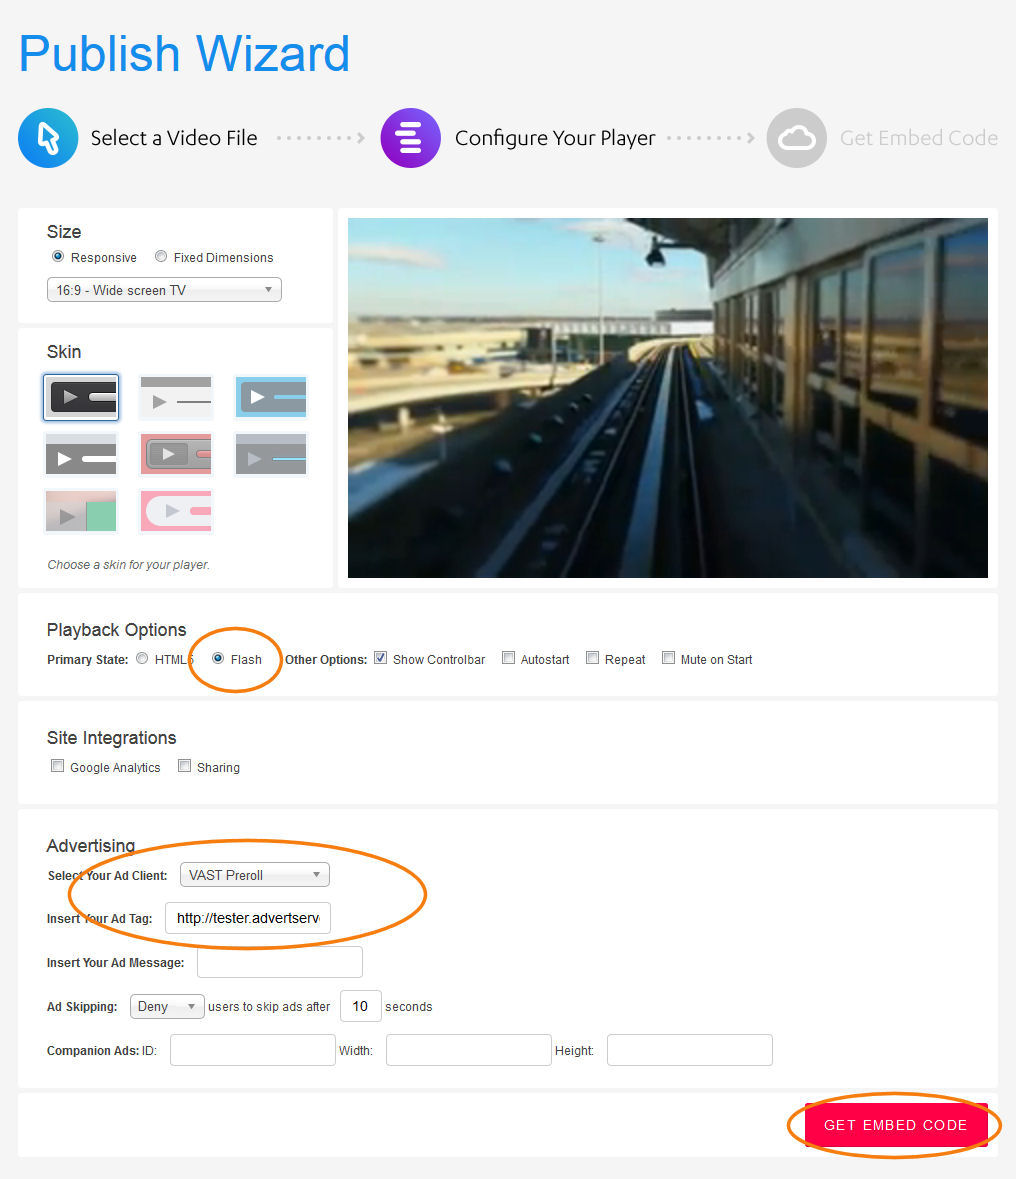
- Make sure that your primary player is selected as Flash and it will automatically fall back on using HTML5 for visitors without Flash capability.
- You then need to select VAST Preroll for the Ad Client and enter the VAST Tag that you generated earlier into the provided Insert Your Ad Tag box as shown in the screenshot above.
- When everything is set how you like it press the Get Embed Code button.
Publishing Your Video
The first part of the Embed Code should be pasted into the <head> section of your page
and will look similar to the following:
<script src="http://jwpsrv.com/library/yourlicensekey.js"></script>
The second part of the Embed Code should be pasted into the <body> section of your page
where the video should actually appear and will look similar to the following:
<div id='playerlY5ILoW2TpH4'></div>
<script type='text/javascript'>
    jwplayer('playerlY5ILoW2TpH4').setup({
        file: 'http://e736daa9861a3da5faf4-49d13c85de3b1b0658221edbffbf1629.r69.stream.cf2.rackcdn.com/traintracks.mp4',
        image: 'http://8ea7863d68099f00b39c-49d13c85de3b1b0658221edbffbf1629.r69.cf2.rackcdn.com/traintracks480.jpg',
        width: '480',
        height: '270',
        aspectratio: '16:9',
        stretching: 'fill',
        primary: 'flash',
        advertising: {
            client: 'vast',
            tag: 'https://tester.advertserve.com/servlet/vast2/media?mid=124&pid=0&random=__random-number__'
        }
    });
</script>
I've actually changed the width and height to 480x270 in the above code
and added the stretching: 'fill' option to make the video stretch to
fill that entire space.
Final Thoughts
This was a great introduction to third-party video ad serving, but VAST has much more to offer. We will be publishing more blogs in this series covering mid/post-roll video ads, companion banners and non-linear banners. Again, we'll be using JWPlayer but you can also use other players such as Brightcove, Flowplayer or Projekktor to accomplish this as well, so stay tuned for more!

 Mike Cherichetti
