Introducing Magic Banners
Unless you have been living under a rock you should know that HTML5 is all the rage these days and rightfully so. Flash had a great run, but it is on the way out. Larger advertisers have already made the switch to HTML5, but for smaller advertisers that are not working with a design agency the change is not as easy. We hope to close that gap with our new magic banner studio, which is a visual tool that allows you to quickly design animated HTML5 banners with little to no coding!
Your First Magic Banner
This tutorial is actually going to be a series of 5 tutorials. In this first tutorial we will cover creating non-animated HTML5 banners with nothing more than a single image and some text copy. We will also use a template to speed things along. In the upcoming articles we will get into more advanced topics such as animation, timing of animations, combining multiple animations to create a sequence, buttons, icons, sprites and more so stay tuned for those.
Video Tutorial
Step by Step Tutorial
- Click on the Media icon in the main AdvertServe tool bar and then click on the Create New Media link.
- Next you will want to go through the usual steps of entering a name for your banner and selecting the advertiser.
- Then you will want to choose Magic Banner for the media type and also select the desired Size (i.e. 300x250)
- You should then see that the visual editor is loaded, which will look like the following
screenshot:
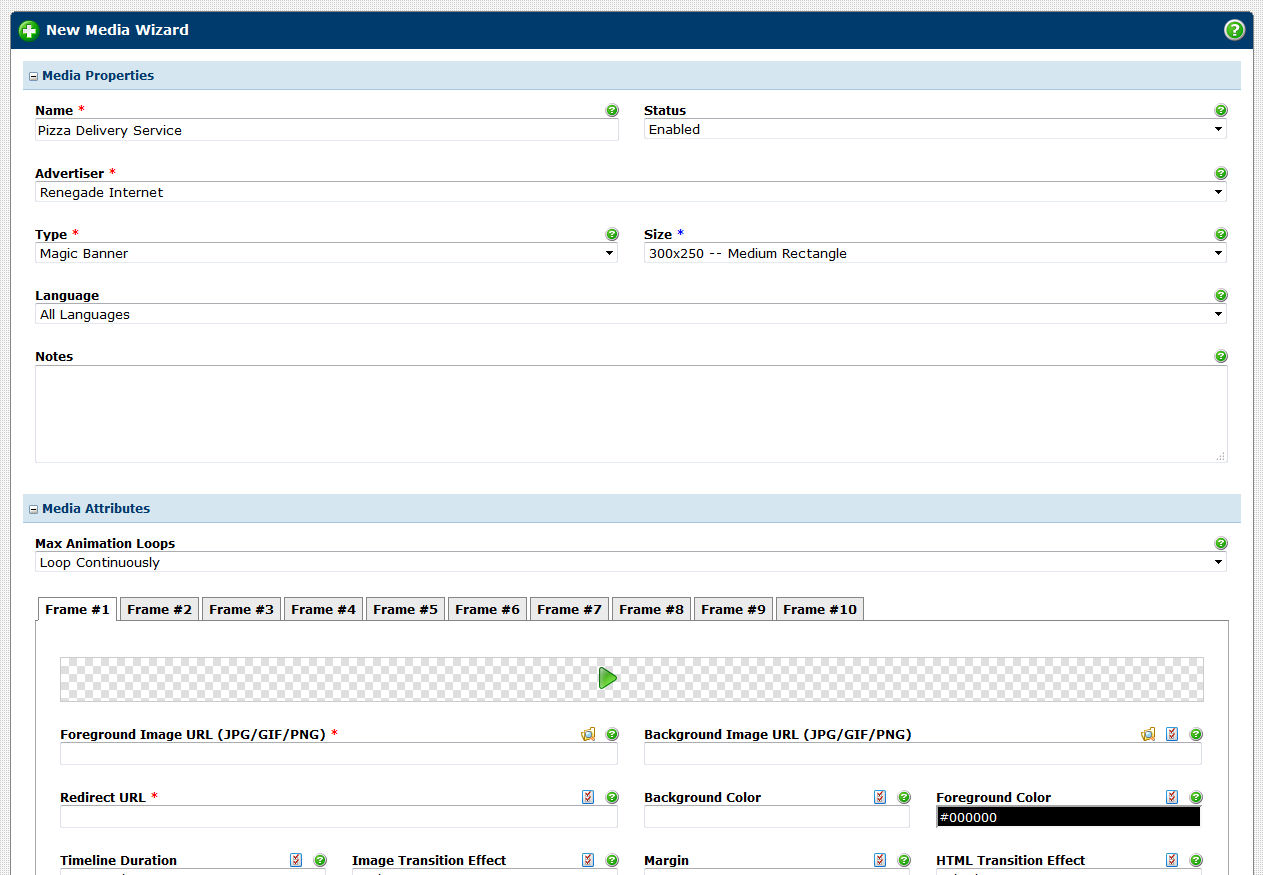
- Not much to see here yet because the first thing we need to do is upload an image,
which we can do by clicking on the file folder icon above the Foreground Image URL field.

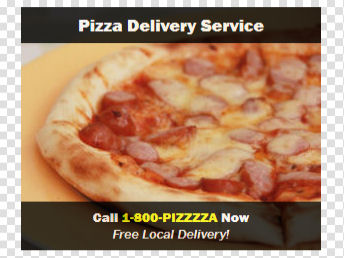
- For this example I have a 300x250 JPG file that is a closeup picture of a pizza and I do apologize if you are reading this on an empty stomach.
- Once you have uploaded and selected your image you will see that the visual editor
is activated and you have a lot of shiny buttons to click on.
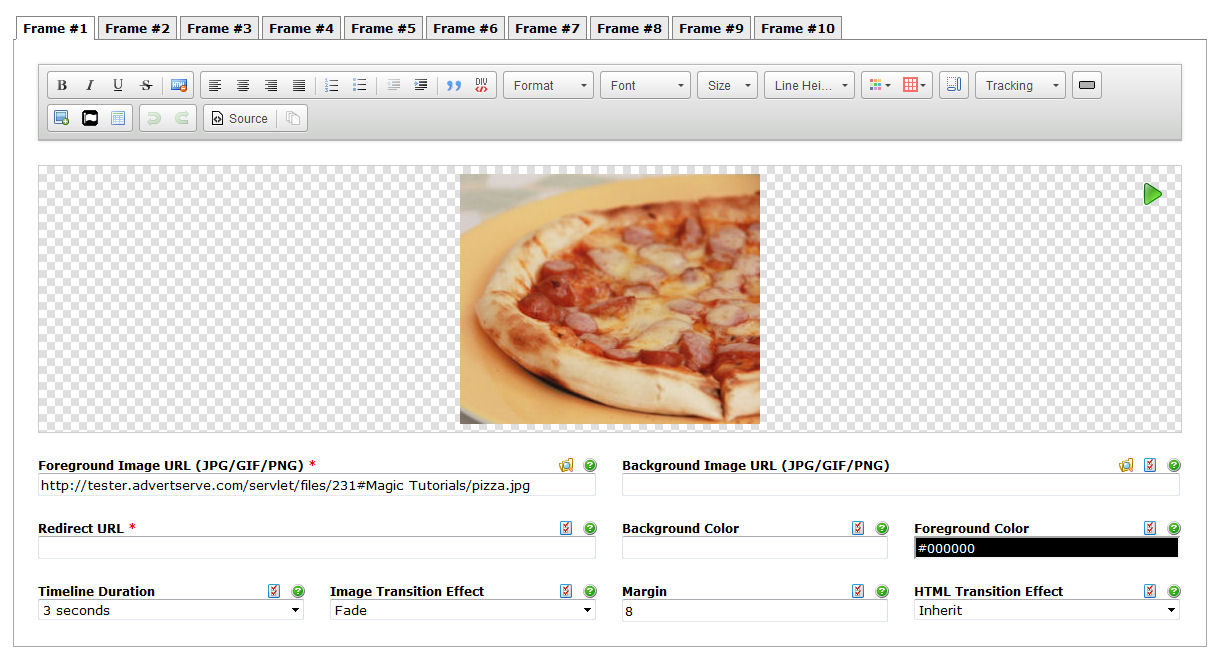
- Most of the buttons deal with formatting text, such as bold, itatlic, underline, left/right/center, font, size, line height, color, letter spacing (tracking) and so on. You can also visually create divs and tables as well as add images. We even have Font Awesome icons and a fancy button designer for you to play around with.
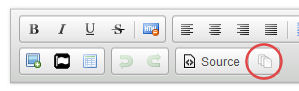
- We are keeping things simple with this tutorial, however, so I want you to click on the
last icon to browse our template library.
- Scroll down and click on the Easy Banner template.
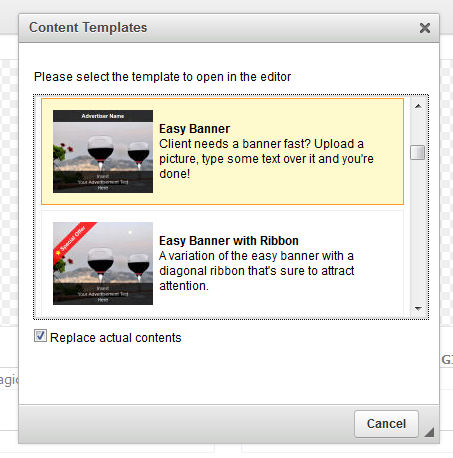
- Now you have a couple of nice text boxes on top of your image where you can type in
a heading and a call to action.

- I actually do not like how the text boxes do not go right to the edge of the image though.
We can easily fix that. Simply change the value of the Margin field to 0 (zero) and watch
what happens.
Editor Tricks
Play Button
Notice the green play button in the upper right corner of the visual editor? You can click on that at any time to get a quick preview of the animation for the current frame. Although changing any of the fields, such as the margin will automatically trigger it to play so you get fast visual feedback when making changes.
Copying
Maybe you want to take this a step further and add a second frame with a different call to action? Perhaps you could highlight some current specials. Whatever the case, if you click on the arrow icon above the Foreground Image URL field it will copy the pizza image from the first frame. Then if you click on the copy icon in the upper left corner of the visual editor it will copy over all of your text. Then you can simply make the edits you want and like magic you have a HTML5 banner with two frames.
Timeline Duration
Use the Timeline Duration to control how long each frame is displayed for before switching to the next frame.
Transition Effects
Try changing the Image Transition Effect to Static and the HTML Transition Effect to Vanish and watch what happens.
Pretty cool, eh? I said this tutorial would not get into animation, but it is just so easy that I could not resist!
Note that I have set the animation to loop infinitely every 5 seconds here for example purposes -- if this were a real banner that would be super annoying so please refrain from doing that!
Source Editing
Want to tweak something in the HTML? Simply click on the Source button in the visual editor. Most HTML tags as well as CSS rules or inline styles are allowed. Tags that are not permitted include: APPLET, EMBED, OBJECT, IFRAME and SCRIPT tags for security and performance reasons.
Stay Tuned!
Hopefully this quick introduction to magic banners takes away some of the mystery and perhaps also some of the intimidation factor that goes along with HTML5. Who knows, this simple tutorial might even help you out when an advertiser comes along and does not have any banners readily available. You can simply grab a photo of their product, drop some text on it, add a little animation and presto they have a nice banner up and running.
 Mike Cherichetti